REVIEW · EDINBURGH
Edinburgh: Stirling Castle & Loch Lomond Private Luxury Day Tour
Book on Viator →Operated by Hopscotch Travel · Bookable on Viator
Castles and lochs in one smooth day. This private luxury outing strings together Stirling Castle, the pretty Gateway to the Highlands town of Callander, and the spellbinding shores of Loch Lomond with a comfortable ride and a real-time guide voice in your ear.
I love the way the day is built around two heavy hitters: Stirling Castle (history up close, views out the windows) and Loch Lomond in Loch Lomond and The Trossachs National Park (mountain-backed water and big-photo moments).
One thing to keep in mind: the price covers the tour ride and guiding, but lunch and attraction entry fees aren’t included, so you may want to budget a bit extra—especially for the Stirling Castle ticket.
In This Review
- Key highlights worth planning around
- Stirling Castle first: why the day starts with royal drama
- Callander: the quick Highlands warm-up before the big scenery
- The Trossachs road run: Dukes Pass in comfort
- Aberfoyle and Queen Elizabeth Forest Park: a calm village stop
- Loch Lomond and the Trossachs National Park: where the views get serious
- Balmaha: Tom Weir statue, coffee, and a loch-side pause
- What you actually get for the $619 price
- Timing, pacing, and how to use an 8-hour private day
- Who this tour is best for (and who should skip it)
- Should you book this Stirling Castle and Loch Lomond private luxury day tour?
- FAQ
- How long is the Edinburgh: Stirling Castle & Loch Lomond private luxury day tour?
- Is lunch included in the tour price?
- Are the entry tickets for Stirling Castle included?
- Do you offer pickup from Edinburgh hotels or ports?
- What is the tour like if the weather is poor?
- Is this tour private for just my group?
Key highlights worth planning around
- Private transportation in an air-conditioned vehicle with bottled water and onboard WiFi
- Stirling Castle first, so you hit the main stop while the day is fresh
- Gateway to the Highlands vibe in Callander, plus an easy River Teith stroll
- Dukes Pass and Trossachs Road scenery, with timed breaks that don’t feel rushed
- Loch Lomond photo time at Balmaha, including the Tom Weir statue and time for coffee
- Guides with personality: named guides in past bookings include Fraser, Andrew Swain, Stewart, Michael, and others
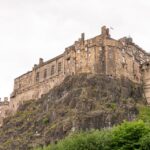
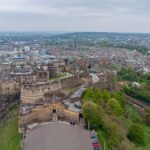
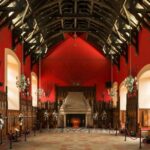
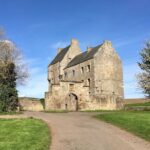
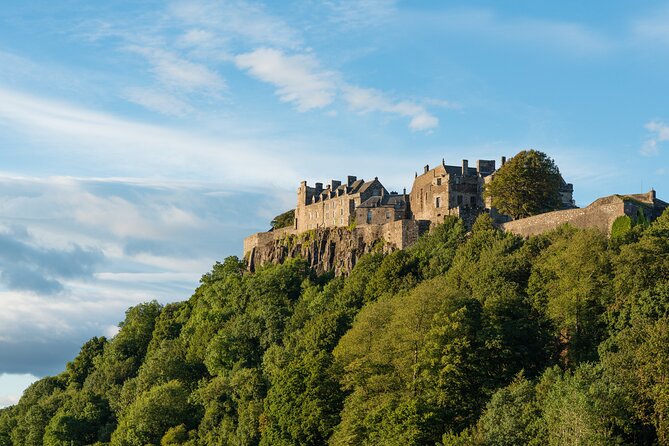
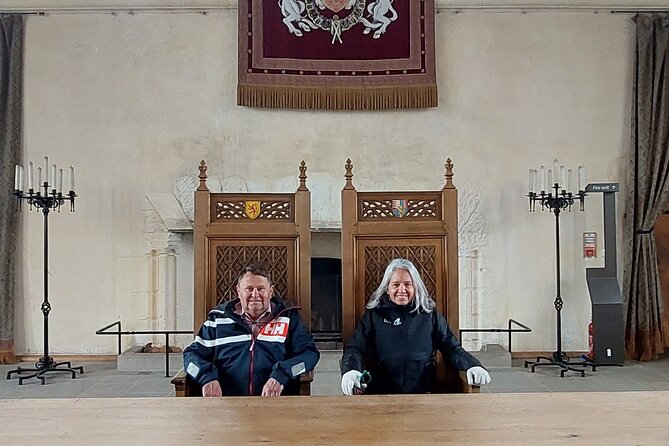
Stirling Castle first: why the day starts with royal drama
The schedule begins at Stirling Castle, and that’s smart. This place is more than a pretty fortress on a hill. It’s a compact lesson in Scotland’s royal world, with corridors and courtyards that help the story feel less like a textbook and more like a lived-in place.
You get about 1 hour 30 minutes here. That’s enough time to do the essentials: take in the castle grounds, soak up the views over Stirling, and connect the dots between kings and queens, plus the battles that shaped the country. There’s something satisfying about walking cobbled paths inside castle walls. It’s the kind of setting that instantly makes you understand why this is a firm favorite.
Two practical tips for using that time well:
- Arrive ready to slow down for photos. The viewpoints inside the castle area are a big part of why people love the stop.
- If you want the history to land, use the guide’s flow and don’t just drift room to room. Ask a quick question when something clicks, then keep moving.
Just note the Stirling Castle admission ticket is not included. You can still plan a smooth visit, but don’t count that cost as covered.
You can also read our reviews of more private tours in Edinburgh


Callander: the quick Highlands warm-up before the big scenery
After Stirling, you head to Callander for about 1 hour. This is known as the Gateway to the Highlands, and you can feel that. Think small-town Scottish charm with coffee shops, gift shops, and a great whisky-shop stop built right into the vibe.
You also get a simple, scenic option: a stroll along the River Teith, where you’ll see the countryside opening up behind town with Ben Ledi and the Craggs in the background. This is the part of the day where you’re not fighting for time or making tough choices. It’s a reset.
What I like about this stop for your planning: it breaks up the castle intensity. Instead of jumping straight into long road scenery, you get a human-scale pause. You can grab a warm drink, use the restroom, and stretch before the drive into the Trossachs.
If you’re traveling with kids, this stop can work nicely too. The timing gives you a chance to keep energy up before the longer viewing moments at Loch Lomond.
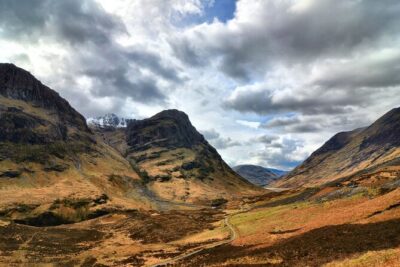
The Trossachs road run: Dukes Pass in comfort
Next comes a scenic driving segment on Trossachs Road, including Dukes Pass. You’ll have about 30 minutes, and that’s a good amount of time for a drive like this. It’s not a long bus tour day where every stop feels like waiting. You’re getting scenery without losing the rhythm of the itinerary.
From a value standpoint, this is where private transportation pays off. You don’t have to coordinate trains, juggle schedules, or stand around trying to catch the perfect angle at the roadside. The guide can time things so you’re seeing the road and the hills without turning your day into a series of complicated micro-plans.
The best way to enjoy this portion is to treat it like a moving viewpoint. Keep your phone charged, have water within reach, and don’t overthink which side of the van you’re sitting on. If you’re the type who likes photos, you’ll still get opportunities, just stay ready rather than expecting one perfect postcard moment to fix everything.
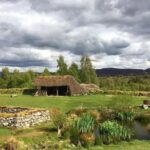
Aberfoyle and Queen Elizabeth Forest Park: a calm village stop
You’ll spend about 1 hour in Aberfoyle, a picturesque village along the River Forth, sitting within Queen Elizabeth Forest Park.
This stop is less about one single landmark and more about atmosphere. When you get out, you’ll likely find it easy to slow down: river air, forest edges, and small-town pacing. The timing is also realistic. It’s long enough to wander and short enough that the day stays on track for Loch Lomond.
What you can do with the hour:
- Take a gentle walk and enjoy the river setting.
- If you want a break from constant sightseeing, this is the one where you can just breathe.
One thing to watch: because lunch isn’t included, you may want to think about whether Aberfoyle is a good moment to eat nearby—or whether you’d rather save that appetite for later.
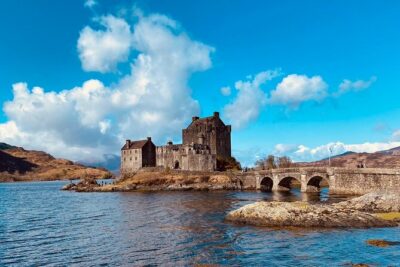
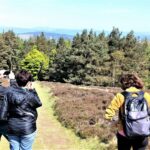
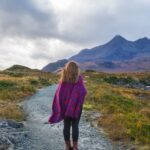
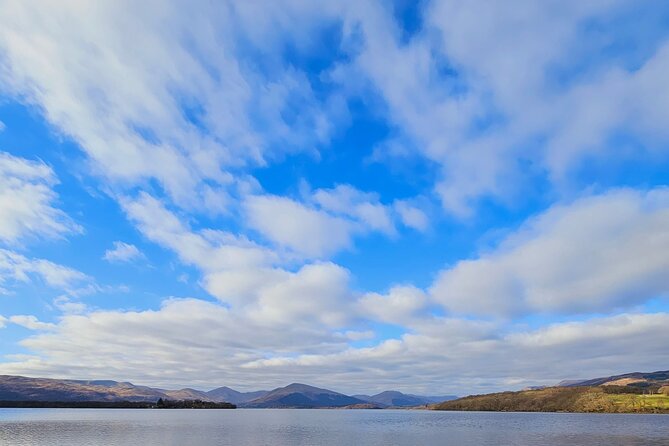
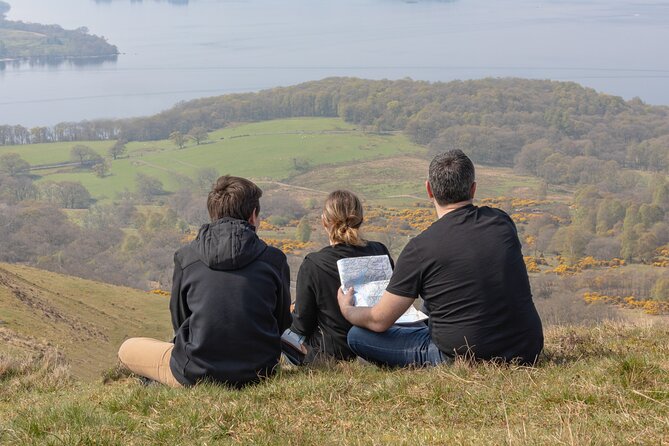
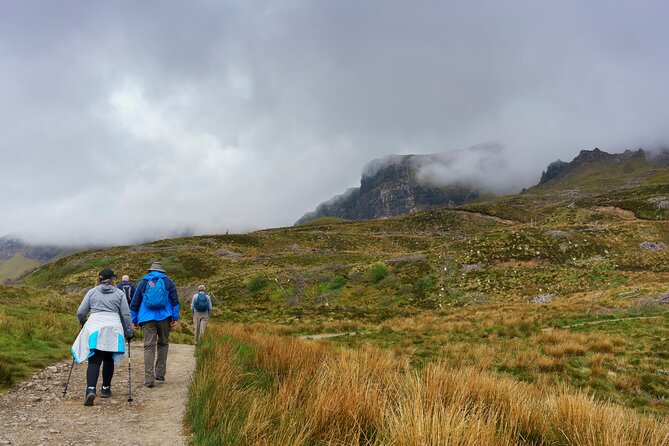
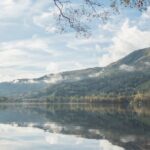
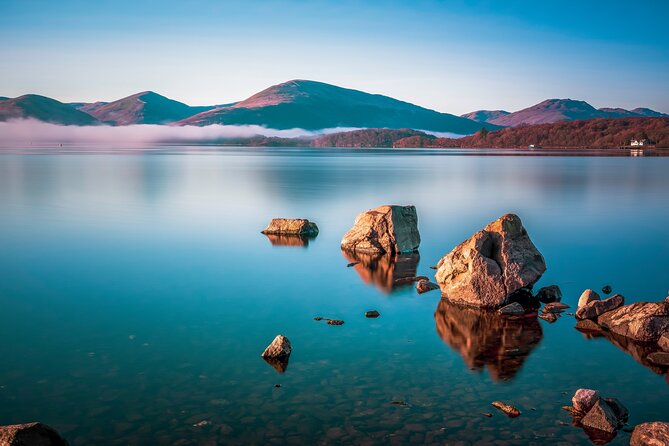
Loch Lomond and the Trossachs National Park: where the views get serious
Then you arrive at the big pay-off: Loch Lomond and The Trossachs National Park. You’ll have about 1 hour here, and the focus is the bonnie banks of Loch Lomond—water framed by mountains and the local “Ben” looking down over the loch.
This is the kind of scenery that changes your mood. It’s not just pretty; it makes the whole day feel worth it. After castles and villages, Loch Lomond gives you open space and a wider sense of Scotland beyond stone walls.
Practical advice: keep expectations flexible. The day relies on weather being decent for best results. If the clouds roll in, the scenery can still look dramatic, but the bright postcard photos may be harder to nail. Either way, the scenery remains the point.
You’re also not just passively stuck in the van for this stop. You’ll have real time to look around, take photos, and absorb the scale of the loch.
You can also read our reviews of more tours and experiences in Edinburgh


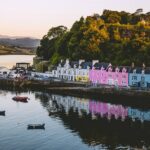
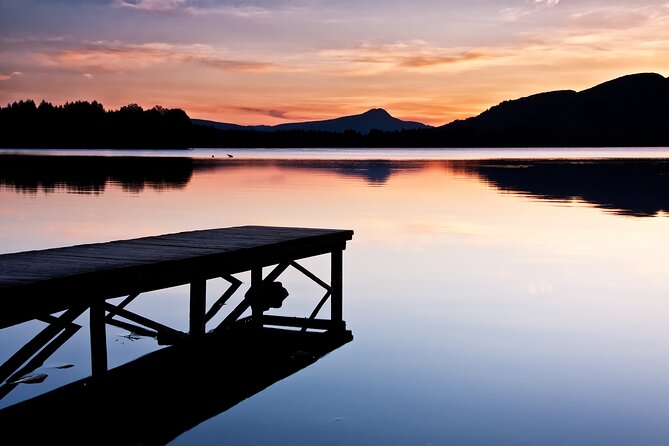
Balmaha: Tom Weir statue, coffee, and a loch-side pause
After Loch Lomond, you stop in Balmaha for about 1 hour. This is one of the best places on the loch to truly marvel at the water, and it comes with an instantly recognizable photo opportunity: the Tom Weir statue with his bobble hat.
Tom Weir is a famous Scottish climber, TV presenter, and author, so this little statue actually gives you a neat cultural angle to go with the scenery. It’s the kind of detail you’d miss if you were traveling on your own without a local guide pointing out why a random statue is worth your time.
Balmaha also gives you a practical perk: there’s a coffee shop if you want a wee coffee and cake. Since lunch isn’t included, this can be your easy built-in option for staying fueled without derailing the schedule.
If you’re trying to get the most out of the day, think of Balmaha as your final “breathe and enjoy” block. It’s where you can stop chasing, start enjoying, and soak up the loch vibe before heading back toward Edinburgh.
What you actually get for the $619 price
At $619.24 per person, you’re paying for more than driving and a checklist. The value is in the private setup and the comfort support around long-distance touring.
Here’s what’s included that matters in real life:
- Private transportation in an air-conditioned vehicle
- WiFi on board (useful when you’re trying to map small stops fast)
- Bottled water
- All fees and taxes (so you’re not guessing what’s tacked on)
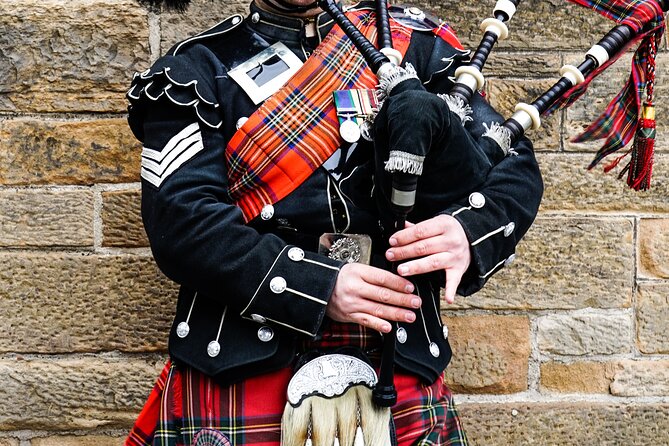
- An experienced kilt-wearing guide
That guide component is a big part of why these tours feel different from a standard coach. In past bookings, guides such as Fraser and Michael were singled out for being engaging and keeping things on time, while Andrew Swain and Stewart showed up in reviews as well. The consistent theme: the storytelling and pacing were what made the day feel smooth.
The costs that are still on you:
- Lunch isn’t included
- Entry fees to attractions aren’t included, including Stirling Castle admission
So I’d treat this as a “comfort + planning” purchase, not a “everything free” package. If you’re the kind of traveler who hates surprises, do a quick budget check on castle ticket(s) and decide where you’ll eat.
Also, note that it’s a private tour for your group only. That’s why it can feel more relaxed than larger group formats.
Timing, pacing, and how to use an 8-hour private day
The tour runs for about 8 hours, starting at 9:00 am. That timing matters. You’re getting an early start that helps you use daylight well, especially for outdoor scenery at Loch Lomond and photo moments at Balmaha.
The pacing is built around a mix of:
- One major must-see (Stirling Castle)
- Two shorter stops that reset your day (Callander and Aberfoyle)
- A scenic drive segment (Dukes Pass / Trossachs Road)
- Two loch-focused blocks where you can actually look, not just glance (Loch Lomond and Balmaha)
If you want to maximize your experience, come prepared for the stop-by-stop rhythm:
- Wear shoes you can walk in on cobbles and uneven ground.
- Bring a light layer for wind off the loch.
- Keep an eye on photo timing. Some moments are quick even if the stop isn’t.
Also, since pickup is offered from any Edinburgh hotel or port, you save time and hassle on the front end. You won’t need to figure out a meeting point across town.
Who this tour is best for (and who should skip it)
This is a strong fit if you want:
- A private day trip without the stress of public transport
- Scenic highlights without long gaps between places
- A guide who can connect stories to the places you’re seeing
It’s especially good for couples and small groups who’d rather pay for comfort and smoother logistics than split up, walk more, or manage multiple transfers.
It may be less ideal if:
- You’re on a tight budget, since entry fees and lunch add up on top of the tour price
- You need a completely weather-proof plan. The experience requires good weather, and that can matter for the Loch Lomond portion.
One more note: this tour is booked far in advance on average (128 days). If your dates are fixed, plan early.
Should you book this Stirling Castle and Loch Lomond private luxury day tour?
I’d book it if you want a classic Scotland day with real comfort and zero coordination headaches. The mix of Stirling Castle, a charming town reset in Callander, and the dramatic payoff at Loch Lomond is a solid use of an 8-hour day. The included ride comforts (A/C, WiFi, bottled water) make a long day feel easier, and the guide-driven pacing helps you avoid the common problem of spending your day rushing from one place to the next.
I would pause and double-check your budget if you hate paying extra at the last minute. The key add-ons you’ll likely face are Stirling Castle admission and lunch.
If you want a private day that feels planned, not improvised, this one fits that goal.
FAQ
How long is the Edinburgh: Stirling Castle & Loch Lomond private luxury day tour?
It runs for about 8 hours starting at 9:00 am.
Is lunch included in the tour price?
No. Lunch isn’t included.
Are the entry tickets for Stirling Castle included?
No. Admission tickets are not included, including Stirling Castle.
Do you offer pickup from Edinburgh hotels or ports?
Yes. Pickup is offered from any Edinburgh hotel or port. The team contacts you at least 24 hours before to confirm details.
What is the tour like if the weather is poor?
This experience requires good weather. If it’s canceled due to poor weather, you’ll be offered a different date or a full refund.
Is this tour private for just my group?
Yes. It’s listed as a private tour/activity, so only your group participates.
If you tell me your travel month and group size, I can help you estimate the likely extra spend for castle entry and pick the most sensible lunch approach.