REVIEW · EDINBURGH
The History Behind Outlander Tour
Book on Viator →Operated by Yaldi Tours · Bookable on Viator
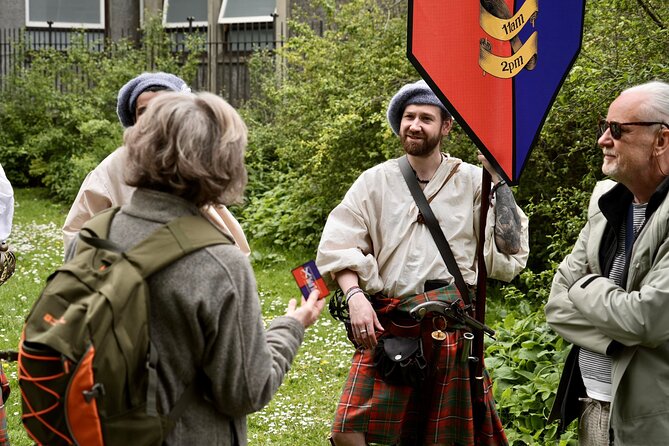
Edinburgh turns Outlander lore into street-level history. This tour links the show to real Jacobite-era events while you walk key Old Town landmarks with a guide in period clothing.
I particularly like the historical accuracy and how the guide connects sites to the story, not just the TV show. The weapons display also feels like the best kind of extra: hands-on, detailed, and done with real period items rather than gimmicks.
One thing to keep in mind: this experience depends on good weather, and it does involve walking through central Old Town streets, so you’ll want a moderate fitness level.
In This Review
- Key Highlights Worth Your Time
- A Jacobite Story Walk Through Edinburgh’s Most Famous Streets
- Royal Mile Start: Getting Oriented Fast at the Right Corner
- Mercat Cross: Where Edinburgh’s Traditions and Public Life Meet
- Parliament Square: The Power Center Behind the Uprising Mood
- Bakehouse Close and Alexander Malcolm’s Printshop: When Words Became Power
- Chessel’s Court and Deacon Brodie: Mischief With a Side of Danger
- Outside the Palace of Holyroodhouse: Jacobite Court and Scottish Parliament Talk
- Canongate Kirk Graveyard: Where the Names of the Uprisi ng Get Real
- Guides, Period Clothing, and the Weapons Display Moment
- Sample Scottish Delights and the Small Touches That Matter
- Price and Time: Is $89.29 Good Value?
- Practical Tips Before You Go (So You Enjoy It More)
- Should You Book This Outlander Tour in Edinburgh?
- FAQ
- How long is the Outlander Tour in Edinburgh?
- Where does the tour start and end?
- What is the group size limit?
- Is the Palace of Holyroodhouse admission included?
- Are service animals allowed?
- What kind of physical fitness is needed?
- If I cancel, can I get a refund or change my booking?
Key Highlights Worth Your Time
- Period-clothed expert guides who explain what you’re seeing and why it mattered
- Alexander Malcolm’s Printshop area used as a reference point tied to Jacobite-era communication
- Full weapons display, plus a chance for a closer look at real period items
- Deacon Brodie story stop in a tucked-away part of Edinburgh with plenty of character
- Graveyard visit at Canongate Kirk, where names from Jacobite uprisings get real
- Small group size (max 34) for a tour that still feels guided, not rushed
A Jacobite Story Walk Through Edinburgh’s Most Famous Streets
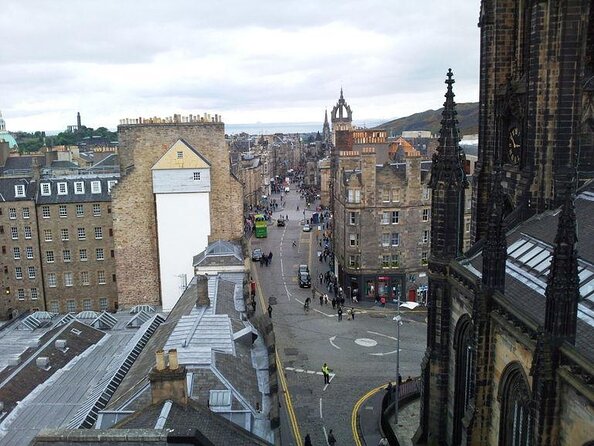
Edinburgh’s Old Town is the kind of place where you keep turning corners and thinking, how is this real? That’s exactly why this tour works. You’re not just looking at buildings. You’re learning how the city’s streets, power centers, and hidden closes shaped the Jacobite rebellion—and how writers later borrowed that mood for Outlander.
I like that it’s built around short stops rather than long speeches. You get quick orientation, then the guide ties each place to people and conflict. Even if you’re less obsessed with the show, the political tension of the era is the actual star.
The route is mostly in central Edinburgh, so if you’re planning other sights, it’s easy to fit. The pacing also suits most people who can handle an easy-to-moderate walk for about two hours.
You can also read our reviews of more historical tours in Edinburgh


Royal Mile Start: Getting Oriented Fast at the Right Corner

You meet at the VisitScotland iCentre on the Royal Mile. It’s a practical spot because it’s easy to find and a natural launch point for Old Town exploring. The opening minutes are about setting the stage—what you’re about to see, and how Jacobite-era Edinburgh functioned day to day.
This first stretch matters more than it seems. If you’ve never studied the period, the guide’s setup gives you a mental map. And if you are an Outlander fan, it helps you recognize how the show’s atmosphere is rooted in real places, not invented scenery.
You’ll also get moving quickly, which means less waiting around and more time for the story to land.
Mercat Cross: Where Edinburgh’s Traditions and Public Life Meet
From the Royal Mile, the tour heads toward Mercat Cross, a landmark tied to Edinburgh’s public life and city traditions. This stop works best if you pay attention to what the guide says about how people gathered, traded, and communicated.
It’s also a clever transition. Mercat Cross isn’t just a photo point. It’s the kind of place where authority, rumor, and public messaging all had room to spread. That’s the heartbeat of why Jacobite politics caught fire—because information and allegiance traveled through real spaces.
Expect a short, focused explanation. You won’t feel lectured; you’ll feel pointed.
Parliament Square: The Power Center Behind the Uprising Mood
Next is Parliament Square, where you recap Scottish governance and the events that helped set the stage for Jacobite uprisings. This is where the tour starts to click for me as a story, not just a list of locations.
Even if you only remember bits from school history, Parliament Square gives you the bigger picture: Edinburgh wasn’t simply a backdrop—it was part of the engine of conflict. The guide uses what you see nearby to explain how political tension shaped decisions and loyalties.
One drawback here is simple: it’s a standing-in-a-suggested-area type stop. If you prefer fully seated narration, this may feel brisk, but the tour keeps moving in a way that prevents fatigue.
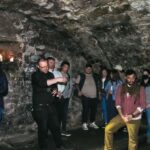
Bakehouse Close and Alexander Malcolm’s Printshop: When Words Became Power
Now you get to one of my favorite parts of the day: moving into Bakehouse Close, a more secluded slice of Old Town. The guide brings you to the area connected with Alexander Malcolm’s print shop, which is an ideal bridge between “the show” and “the real era.”
In Jacobite times, printed material and messaging mattered because it helped shape public opinion. That idea turns the streets into something more than scenery. Suddenly, you’re imagining pamphlets, announcements, and propaganda-style persuasion traveling through narrow passages like these.
The tour also uses this stop to talk about weapons and armaments associated with the Jacobite soldiers. That matters because it turns romance into stakes. Love and loyalty were real themes, but they were wrapped around danger.
This is the stop where you’ll appreciate the guide’s tone most: it’s vivid without turning into fantasy.


Chessel’s Court and Deacon Brodie: Mischief With a Side of Danger
The next turn takes you to Chessel’s Court, another hidden corner where the guide tells the story of Deacon Brodie. This is where the tour feels like it knows Edinburgh is full of contradictions—official power on one end, secrecy and misbehavior on the other.
Deacon Brodie’s inclusion is smart because it shows how ordinary life and moral gray areas fit into a city famous for rebellion. The Jacobites weren’t the only drama. Edinburgh’s character included both public respectability and private trouble.
If you love stories that have texture—human scale stuff, not just dates—this stop is a standout. It’s also a nice pace change before the tour shifts back to Jacobite-focused ground.
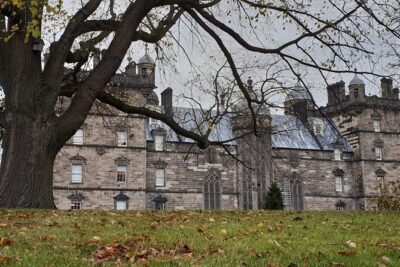
Outside the Palace of Holyroodhouse: Jacobite Court and Scottish Parliament Talk
The tour ends at Canongate Kirkyard after a stop at the Palace of Holyroodhouse area, where you discuss the Jacobite court and the Scottish Parliament. The important detail here is that you’re hearing context rather than doing a long attraction visit. Admission isn’t included for this stop, and you’re positioned outside, so it’s built for storytelling more than museum time.
This segment is useful because it connects two strands of the era: the symbolic show of power and the actual political institutions around it. If you’ve ever wondered how the show’s courtly drama relates to real life, this is where the guide makes that bridge clear.
The upside is you still get a strong sense of place without committing extra time. The possible downside is you won’t have a full interior experience, so if you expected a full palace visit, adjust your expectations.
Canongate Kirk Graveyard: Where the Names of the Uprisi ng Get Real
Next comes Canongate Kirkyard, where the tour enters the historic graveyard and visits resting places connected to important figures of the Jacobite uprisings. This is the emotional pivot point of the tour.
Standing in a graveyard makes the story stop being “a TV era” and start being people with consequences. Even if you only know the big names from popular culture, the guide’s explanations put flesh on the dates and decisions that led to rebellion.
The tour keeps this stop respectful and focused. It’s one of those moments where the group voice naturally drops, and you realize why historical fiction often borrows old cemeteries, battles, and letters. They compress the human stakes into a small space.
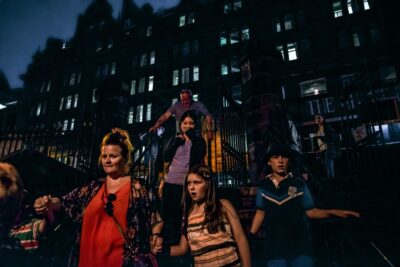
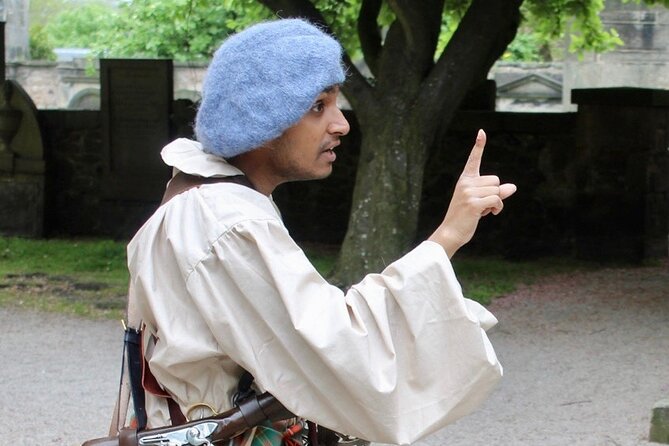
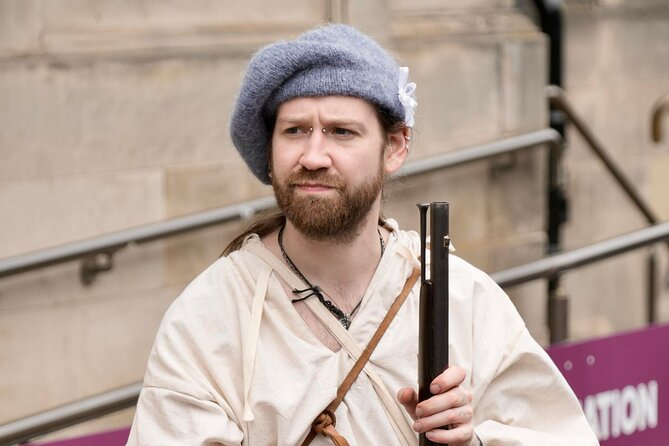
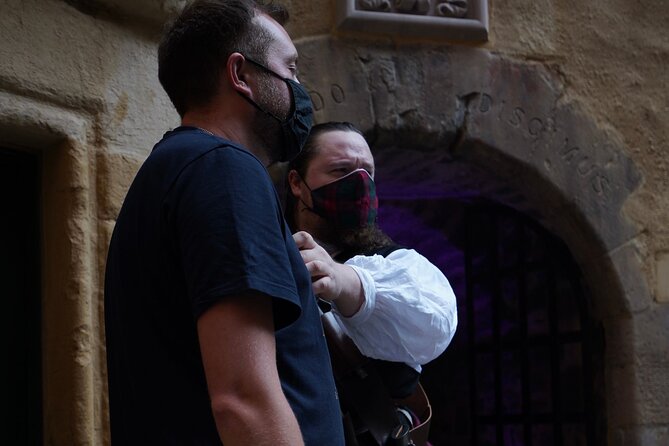
Guides, Period Clothing, and the Weapons Display Moment
This is one of the most praised parts of the experience, and for good reason. The guides wear period clothing, and the narration stays tied to what you’re seeing as you move through the city. Adi the Jacobite guide is specifically called out for being enthusiastic and attentive, and that energy helps keep the historical details from feeling dry.
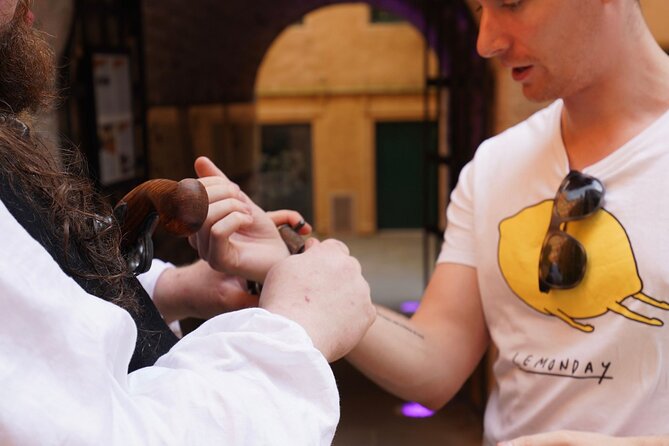
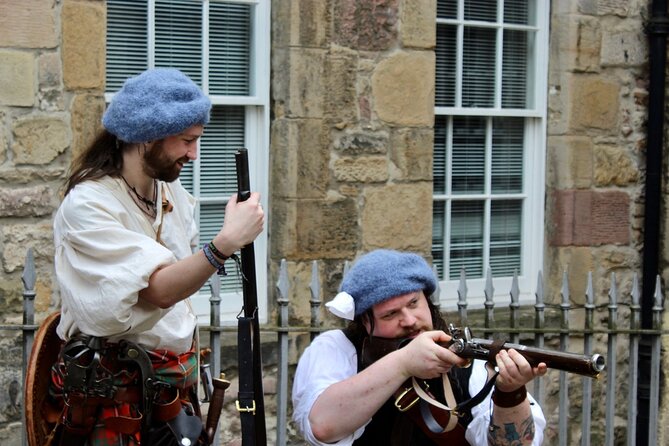
Then comes the full weapons display. The weapons segment isn’t just “look, cool stuff.” It’s presented with context, and it includes a closer look at real items. One person noted they got their hands on legitimate parts of history. That hands-on angle is a huge part of why this tour feels memorable.
I also like that the guide doesn’t let you float through it. The guide’s passion turns into practical explanation, so you’re not just collecting facts—you’re understanding why people carried what they carried, and what that meant in real conflict.
If you’re an Outlander fan, this is where the show’s action language starts to connect to the real world.
Sample Scottish Delights and the Small Touches That Matter
The tour includes sample local Scottish delights, which might not sound like the main event—but it helps the tour feel grounded in place. Food samples also break up the pacing. In a two-hour format, little pauses matter.
This isn’t an all-day meal situation, and you shouldn’t plan to treat the samples as dinner. Think of it as a taste test that supports the theme: Edinburgh, old streets, and the culture that grew around these events.
If you have dietary restrictions, you might want to check with the operator in advance since the exact contents aren’t listed here. It’s always a good idea when food is part of an included segment.
Price and Time: Is $89.29 Good Value?
At $89.29 per person for about 2 hours, the value comes down to two things: a strong guide experience and more than “just walking.” You get a guided tour, a history expert in period clothing, a weapons display, plus the sample Scottish delights, and your ticket is mobile.
For Edinburgh, that’s not a cheap afternoon, but it doesn’t feel overpriced for what’s included—especially the weapons display and the fact that the tour is capped at 34 people. Smaller groups mean you’re more likely to hear details clearly and ask questions without feeling lost.
The tour is also booked about 18 days in advance on average, so it tends to run with real demand. If you’re set on a specific day, you’ll usually have better luck booking sooner rather than later.
Practical Tips Before You Go (So You Enjoy It More)
A few practical points will make this tour smoother:
- Wear shoes you trust. Old Town streets and closes can be slippery or uneven, especially in wet weather.
- Bring layers. The tour runs outside for much of the experience, and it’s explicitly dependent on good weather.
- Use your mobile ticket. The tour uses a mobile ticket, so keep it ready on your phone.
- Expect a guided pace. The stops are short and story-driven, so it won’t feel like a slow wander.
On the logistics side, you’ll get confirmation within 48 hours of booking, depending on availability. And the experience isn’t described as fully flexible if you cancel—so check your calendar before you commit.
Also note the tour requires moderate physical fitness. If you can handle a couple hours of walking with stops, you’ll likely be fine.
Should You Book This Outlander Tour in Edinburgh?
If you want Edinburgh with story glue—where Jacobite events connect to specific streets, not just general vibes—this is a solid choice. The big wins for me are the historical accuracy, the weapons display, and the guide energy (including Adi’s enthusiastic approach). That combination makes it more than a theme walk.
Skip it if you’re mainly chasing an interior attraction day. This tour is about the city as a stage, plus a weapons segment and a graveyard stop—so your time goes toward explanation and context, not museum browsing.
Book it if you’re an Outlander fan and want the show’s mood translated into real landmarks. And if you’re even a little curious about Jacobite history, the tour’s pacing and specificity make it feel easy to follow.
FAQ
How long is the Outlander Tour in Edinburgh?
The tour runs for about 2 hours.
Where does the tour start and end?
It starts at VisitScotland Edinburgh iCentre, Royal Mile, 249 High St, Edinburgh EH1 1YJ, and it ends at Canongate Kirkyard, Canongate, Edinburgh EH8 8BN.
What is the group size limit?
The tour has a maximum of 34 travelers.
Is the Palace of Holyroodhouse admission included?
Admission is not included for the Palace of Holyroodhouse stop.
Are service animals allowed?
Yes, service animals are allowed.
What kind of physical fitness is needed?
It’s described as suitable for travelers with a moderate physical fitness level.
If I cancel, can I get a refund or change my booking?
The experience is non-refundable and cannot be changed for any reason. If it’s canceled due to poor weather, you’ll be offered a different date or a full refund.